
Artisan Woodworking Techniques for Beginners
Last Updated: October 30, 2026
Quick Summary
Artisan woodworking for beginners starts with hand skills, not a tool shopping list: learn to read grain, measure from one reference face, and master four joints, butt with dowels, rabbet, half-lap, and box joint, before dovetails. Start with pine, add cedar for outdoor pieces and walnut for keepsakes, and finish with thin coats suited to how the piece will be used.
- Pine is inexpensive and machines cleanly, cedar resists decay outdoors, and walnut offers stable, predictable grain.
- A beginner kit needs a handsaw, block plane, chisels, marking gauge, try square, tape measure, sander, and drill.
- Plane with the grain direction to get clean shavings instead of tear-out and fuzzy fibers.
- Sand progressively through 80, 120, 150, then 220 grit, raising the grain and sanding again.
- Capture dust at the source with a shop vacuum and wear a fitted N95 or better respirator.
Table of Contents
- What Makes Artisan Woodworking Different for Beginners
- Choosing Beginner-Friendly Wood for Artisan Woodworking
- Beginner Woodworking Tools You Actually Need
- Reading Wood Grain Direction and Measuring Accurately
- Basic Woodworking Joints Every Beginner Should Master
- Wood Finishing Techniques That Protect and Reveal Grain
- Beginner Woodworking Projects to Build Your Skills
- Safety and Dust Management in the Home Workshop
- Troubleshooting Common Beginner Mistakes
- Choosing Heirloom-Quality Pieces from Crazy Daze Woodworking
- Frequently Asked Questions
What Makes Artisan Woodworking Different for Beginners
Artisan woodworking is the practice of building furniture and objects with hand-guided precision, grain-matched material selection, and joinery meant to outlast the maker. It differs from hobby DIY in one measurable way: every cut serves the wood's natural structure rather than forcing the material into a shape. Crazy Daze Woodworking builds heirloom pieces from pine, western red cedar, walnut, and reclaimed barnwood.
The craft tradition behind this work is well documented. The Woodworking section of the Smithsonian's Cooper Hewitt collection traces hand-tool furniture making through centuries of American shop practice, where joinery and grain reading were the marks of a trained hand. That history matters for beginners because it explains why artisan woodworking techniques for beginners start with hand skills rather than a tool shopping list.
Here is the shift most new woodworkers miss: a DIY mindset asks "how fast can I finish this?" A craftsmanship mindset asks "how will this joint behave in twenty years?" That single question changes your wood choice, your tool budget, and your tolerance for a cut that is a hair off square.
The Mindset Shift from DIY to Craftsmanship
Three habits separate the two approaches. First, artisan woodworkers measure twice and cut once, then check the cut before moving on. Second, they let the grain dictate the design instead of fighting it. Third, they finish every surface, including the ones nobody sees, because hidden faces move with humidity just like visible ones.
Practical tip: keep a notebook of every cut and every mistake. A common mistake is treating a ruined board as wasted money. In practice, offcuts become test pieces for finishing samples and joint practice, and that is where real skill accumulates.
Choosing Beginner-Friendly Wood for Artisan Woodworking
Start with pine. Pine is inexpensive, widely available in construction lumber sizes, machines cleanly, and teaches grain reading without punishing your budget. Western red cedar is the better choice for outdoor or moisture-exposed pieces because it resists decay naturally. Walnut costs more but rewards beginners with stable, predictable grain and a finish that needs little help.
Wood selection is where beginners lose the most money. A few rules we follow in our own shop:
- Match the wood to the project. Pine for practice and painted pieces, cedar for plant stands and outdoor work, walnut for keepsake boxes and display objects.
- Check moisture before you cut. Kiln-dried lumber from a reputable supplier is the safe default. Wet lumber moves after assembly and opens joints.
- Read the end grain. Growth rings tell you how the board will cup. A board with rings running like a rainbow will cup away from the center.
- Buy one extra board. You will make a mistake. Budget for it.
Softwoods vs Hardwoods: Pine, Cedar, and Walnut
Softwoods come from conifers and generally cut easier, cost less, and dent more readily. Hardwoods come from deciduous trees, hold detail better, and take a finer finish. Pine and cedar are softwoods; walnut is a hardwood. For a first project, pine teaches the mechanics, cedar teaches weather resistance, and walnut teaches you what a premium material feels like under a chisel.
Beginner Woodworking Tools You Actually Need
You need fewer tools than the internet suggests. A beginner woodworking tools kit that covers real projects: a sharp handsaw, a block plane, a set of chisels, a marking gauge, a try square, a tape measure, a random-orbit sander, and a cordless drill. Add a jigsaw for curved cuts and a drill press only when your projects demand repeatable holes.
The U.S. Consumer Product Safety Commission guidance on power tool safety is worth reading before your first power tool purchase, particularly on guarding and kickback. Safety habits formed early stay with you.
Hand Tools Before Power Tools
Hand tools teach feedback. A handsaw tells you immediately when your stroke drifts off the line. A block plane teaches you to read grain direction by feel and sound. Once you understand what a sharp edge and a true cut feel like, power tools become faster versions of skills you already have rather than substitutes for them.
A common mistake: buying a full power tool suite before learning to sharpen. A dull chisel ruins more joints than a cheap one. Learn to sharpen on a stone first.
Reading Wood Grain Direction and Measuring Accurately
Grain direction determines whether a plane glides or tears. Look at the edge of the board: the grain lines run in one direction. Plane with the grain, meaning in the direction the fibers lean, and you get clean shavings. Plane against it and you get tear-out, fuzzy fibers, and a board that needs sanding to recover.
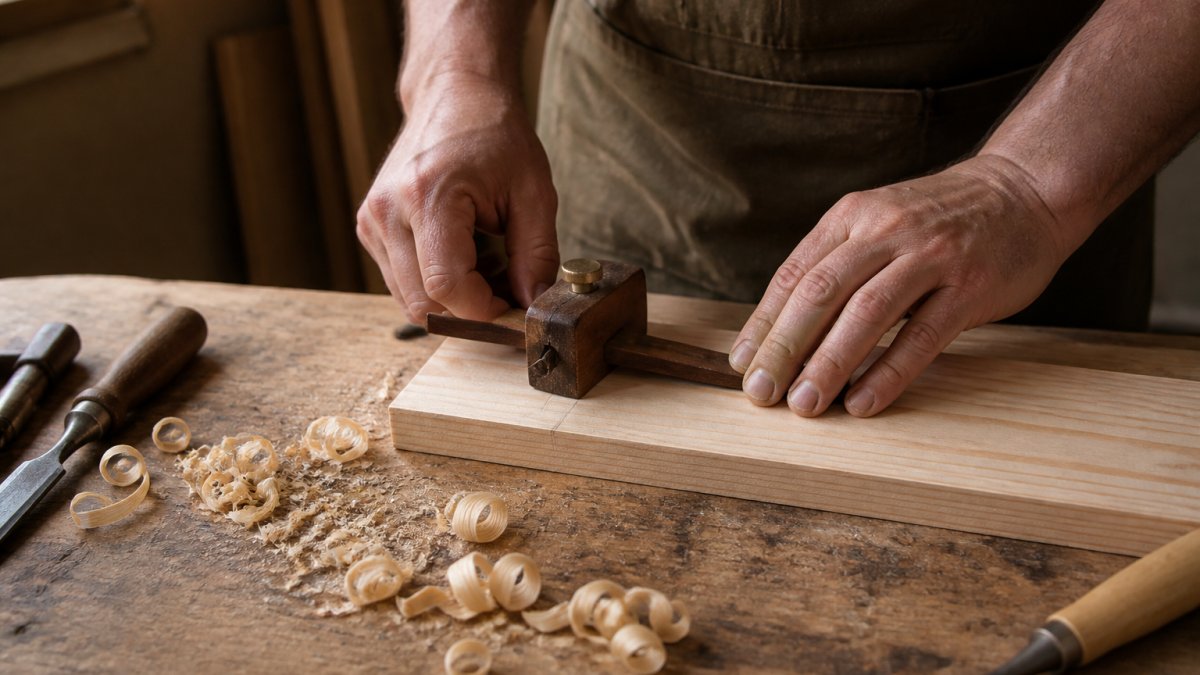
Measuring accuracy is the other half. Mark with a sharp pencil or a marking knife, not a dull pencil. Use a try square against a known straight edge. Measure from the same reference face every time, and never measure from a previous cut. Cumulative error is how a cabinet ends up out of square.
Measure twice, cut once is not a slogan. It is the cheapest quality control available to a beginner.
Basic Woodworking Joints Every Beginner Should Master
Start with four joints, not three: the butt joint with dowels or screws, the rabbet, the half-lap, and the box joint. These cover most beginner projects and teach registration, clamping, and square assembly. Master them before attempting dovetails or mortise-and-tenon, which demand consistent sawing and chisel control.
Strong joints share one trait: they increase glue surface and resist racking. A butt joint alone is weak; a butt joint with dowels or a rabbet gives glue more area to grab. Square edges matter as much as joint type, because an out-of-square joint compounds through assembly.
The Four Beginner Joints and When to Use Each
- Butt joint with dowels or screws. Fastest to cut, weakest without reinforcement. Use for painted utility pieces and shop fixtures. Dowels add shear strength; screws add clamp pressure but split softwood near edges unless you pre-drill.
- Rabbet. A stepped shoulder cut along the edge of a board. Use for cabinet backs, drawer bottoms, and box lids. Cut it with a router, a dado stack, or a shoulder plane. The rabbet registers the mating piece and hides end grain.
- Half-lap. Two boards notched to sit flush. Use for frame corners, stretchers, and simple table bases. The lap resists twisting better than a butt joint and is forgiving of slight thickness variation.
- Box joint (finger joint). Interlocking square fingers that maximize glue surface. Use for box corners and small casework. It is the best beginner introduction to layout, sawing to a line, and chisel paring.
Step-by-Step: Cutting a Simple Box Joint
- Mill your stock flat and square. Joints cut on twisted boards will not close. Joint the reference face and edge, then plane the opposite face parallel.
- Set out the fingers. Mark the first finger width equal to your chisel width (commonly 1/4 in. or 3/8 in.), then step across the board with a marking gauge. Keep the same reference face against the gauge fence every time.
- Cut the shoulders with a backsaw. Stay on the waste side of the line. A fine-tooth backsaw (about 15-20 teeth per inch) gives more control than a crosscut handsaw.
- Remove waste with a chisel. Pare down to the line, checking square after each pass. Register the chisel back against the shoulder line to keep the wall vertical.
- Test-fit dry. The joint should go together with hand pressure, not a hammer. If it binds, pare the high spots rather than forcing it.
- Glue and clamp. Apply glue to both faces, assemble, and check for square before the clamp tightens fully. A diagonal measurement across opposite corners confirms square.
Expected result: a joint that closes with light hand pressure and shows no gaps at the shoulders.
How the Advanced Joints Differ
Once the four beginner joints feel natural, the next step is the half-lap's cousins: the mortise-and-tenon and the dovetail. A mortise-and-tenon is a projecting tenon on one piece fitted into a rectangular mortise in another; it excels at resisting twisting loads in table aprons and chair rails. A through-dovetail interlocks angled pins and tails so the joint resists pulling apart in one direction; it is the traditional box and drawer corner. Both require accurate layout, a sharp chisel, and patience, which is why they come after the beginner four, not before.
Wood Finishing Techniques That Protect and Reveal Grain
Finishing is where a project becomes a piece. The goal is protection without hiding the grain. For most beginner work, an oil-and-wax finish or a clear film finish does the job. Sand progressively through grits, raise the grain with a damp cloth, sand again, then apply thin coats.
Choosing a Finish: Oil, Wax, Varnish, or Film
Finish selection is a trade-off between protection, repairability, and appearance. Most practitioners find these guidelines hold:
- Oil (linseed, tung, or a commercial oil blend). Soaks into the fibers, deepens grain color, and leaves a natural feel. Low protection against water and heat; easy to refresh by adding another coat. Best for boxes, trays, and pieces that will not see heavy use.
- Oil-and-wax. Oil followed by paste wax gives a soft sheen and modest moisture resistance. Wax is repairable and does not build a plastic film. Best for small decorative work and hand-rubbed furniture.
- Varnish or polyurethane (film finish). Builds a protective layer on the surface. Higher water and heat resistance, but scratches show and repair means sanding back to bare wood. Best for tables and surfaces that take abuse.
- Shellac. Fast-drying, easy to repair with alcohol, and compatible under most other finishes. Less water-resistant than varnish. Useful as a sealer coat or a finish for indoor decorative pieces.
A common beginner mistake is choosing a finish by brand rather than by use. A plant stand that lives outdoors needs a different finish than a keepsake box that lives on a shelf.
Surface Preparation Before the First Coat
Finish magnifies surface defects. Sand progressively through grits, typically 80, 120, 150, then 220 for most furniture, and do not skip a grit. Higher grits (320 and above) are for turned work or between coats, not for bare wood on flat panels.
Raise the grain with a damp cloth, let it dry, and sand again with the last grit. This step knocks down fibers that would otherwise stand up under the first coat and force you to sand through finish to fix them.
Applying Thin Coats
- Apply thin coats. Thick coats pool, run, and dry unevenly.
- Wipe off excess oil within minutes so it does not cure sticky.
- Wax over oil for a soft sheen and extra moisture resistance.
- Sand lightly between film coats with 320 grit or a fine abrasive pad to give the next coat something to grip.
Watch out: skipping the grain-raising step leaves fibers that stand up under the first coat, and you will sand through your finish to fix it.
Troubleshooting Finish Problems
| Problem | Likely Cause | Fix |
|---|---|---|
| Finish dries sticky | Excess oil left on surface | Wipe off after minutes; if cured sticky, sand back and recoat thin |
| Cloudy or white spots | Moisture trapped under film | Let wood dry fully; sand back and recoat in dry conditions |
| Brush marks in film finish | Finish too thick or too cold | Thin per label, warm the room, brush with the grain |
| Uneven sheen | Inconsistent sanding between coats | Sand uniformly with a flat block, not fingers |
Beginner Woodworking Projects to Build Your Skills
Build in order of difficulty. Beginner woodworking projects that teach the most per hour: a simple box, a small table, a wooden chair, and a plant stand. Each one adds a skill. The box teaches joinery and square assembly. The table teaches leg-to-apron joinery and leveling. The chair teaches angles and strength under load. The stand teaches repetition and finish consistency.
Start with a box built from pine. You can also see a finished classic wood games piece as a model for a simple project. Use a box joint at the corners, sand to 220, and finish with oil and wax. Then build the same box in walnut and compare how the material behaves. That comparison teaches more than any video.
Safety and Dust Management in the Home Workshop
Dust is the real hazard in a home shop, not the saw blade. Fine wood dust stays airborne for hours and settles into lungs. The OSHA woodworking dust hazard guidance covers exposure limits and control methods for shop environments. For a home workshop, the practical version: capture dust at the source, wear a fitted respirator, and ventilate.
A workable home setup:
- Shop vacuum connected to your sander and saw. Source capture beats sweeping afterward.
- A fitted N95 or better respirator when sanding or cutting, not a dust mask that leaks at the edges.
- An open window or box fan moving air across the shop, not recirculating it.
- Eye protection whenever a machine runs.
- Push sticks for anything narrower than your hand.
Troubleshooting Common Beginner Mistakes
Most beginner problems trace to four causes: dull edges, wet lumber, measuring from the wrong reference, and rushing assembly. Diagnose before you rebuild.
| Problem | Likely Cause | Fix | Impact |
|---|---|---|---|
| Tear-out when planing | Cutting against grain | Reverse board direction, sharpen | Clean surface, less sanding |
| Joint gaps at shoulders | Out-of-square stock | Re-mill, check with square | Tight joints, strong assembly |
| Finish dries sticky | Excess oil left on surface | Wipe off after minutes | Even cure, no sanding |
| Board cups after assembly | Wet lumber | Use kiln-dried stock | Stable piece over time |
| Cuts drift off line | Dull saw or rushed stroke | Sharpen, slow down | Accurate cuts, less waste |
For more shop tips and updates from our bench, check our news articles.
Choosing Heirloom-Quality Pieces from Crazy Daze Woodworking
You can build your own pieces, and we encourage it. You can also browse our hand made wood boxes to see finished artisan work. You can also buy work that already carries the techniques this guide describes. For a custom or heirloom piece, contact Crazy Daze Woodworking with your questions or requests. Our walnut and pine keepsake box is made from walnut and pine, finished with all natural orange oil and Australian beeswax, and fitted with a flocked liner, rubber feet, and gold hardware.

Our egg trays are made from 150-plus year old reclaimed barnwood, sealed in a clear finish to show their unique beauty.
Frequently Asked Questions
What woodworking techniques should beginners learn first?
Start with measuring and marking accurately, then practice sawing to a line and chiseling. Reading grain direction is the next skill to build. Once those feel comfortable, move on to basic woodworking joints like the box joint and rabbet. These core artisan woodworking techniques form the foundation for every project, and each one improves with deliberate practice on scrap wood before you build anything you plan to keep.
What tools do beginners need for woodworking?
A beginner woodworking tools kit can stay small: a crosscut saw, a rip saw, a set of chisels, a block plane, a marking gauge, a combination square, and a drill. Add clamps, sandpaper, and a good workbench. Power tools like a jigsaw and drill press are helpful but not required at the start. Buying fewer, better hand tools teaches you how wood behaves, which is the heart of artisan woodworking.
How do you choose wood for a beginner woodworking project?
Match the wood to the project and your budget. Pine and western red cedar are forgiving softwoods that cut easily and cost less. Walnut and white oak are harder but hold detail and finish beautifully. Check that boards are straight and dry, and avoid pieces with large knots where you need strength. For heirloom pieces, choose wood with clear grain and let it acclimate to your shop before cutting.
What are the easiest woodworking joints for beginners?
The butt joint, rabbet, and box joint are the most approachable. A butt joint needs only glue and screws or nails, while a rabbet adds a shoulder for strength. The box joint interlocks two boards with square cuts and is a great introduction to basic woodworking joints. Practice each on scrap pine until your cuts are square and tight, then apply them to small boxes and shelves.
How do you make clean, accurate cuts in wood?
Mark your line with a sharp pencil or knife, score it with a marking gauge, and cut on the waste side of the line. Keep your saw steady and let the teeth do the work. Support the offcut so it does not bind. For curves, use a jigsaw and sand to the line. Measure twice, cut once remains the rule, and checking square after every cut prevents small errors from compounding.
What is the best finish for a beginner woodworking project?
For a natural look that protects the wood, start with an oil finish such as orange oil followed by beeswax, or a wipe-on polyurethane for more durability. Sand through progressively finer grits before applying. Wood finishing techniques matter as much as the build: thin coats, light sanding between them, and a clean dust-free space. A clear waterproof finish shows off grain while guarding against moisture.
Building heirloom work takes patience, sharp tools, and a willingness to slow down at the cut. If you would rather start with a finished piece than a stack of lumber, Crazy Daze Woodworking offers handcrafted boxes and reclaimed barnwood pieces finished to last generations. Browse our heirloom-quality collection, or contact us to discuss a custom piece. Get started with Crazy Daze Woodworking and bring a piece of real craftsmanship into your home.
